
Children's Placket-Neck Pullover: Done


For some reason, I faced the biggest mental block with the name of this sweater. I even had to refer back to Ravelry just to title my blog post. I made this lil sweater for my nephew, set to arrive this November. I cast on for Trellis first, but the pattern and the yarn didn't vibe very well. After two attempts with different needle sizes, I gave up and cast on for the CPNP.

Pattern: Children's Placket-Neck Pullover. Easy to follow and minimal seaming. Will definitely use again.

Source: Last Minute Knitted Gifts

Yarn: 3.5 skeins Mission Falls 1824 Cotton, Colorway 402. Size: 0-6/6-12. Because of the yarn sub, I followed instructions for the 0-6 version, except for the length measurements, of which I followed the 6-12. The final sweater dimensions are those of the 6-12 month size.

Needles: Size 6 Addis.


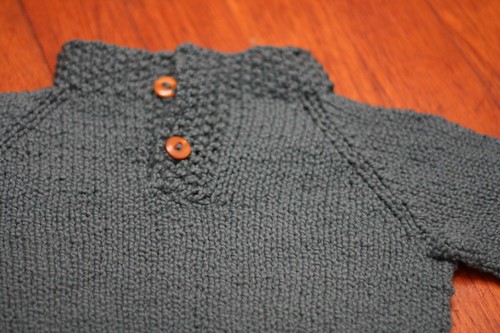
I enjoyed working with the MF Cotton, but will reserve it for projects with an "organic" feel. Its nubby texture workes well for this stockinette sweater, but hides cables and anything that requires sharp stitch definition.

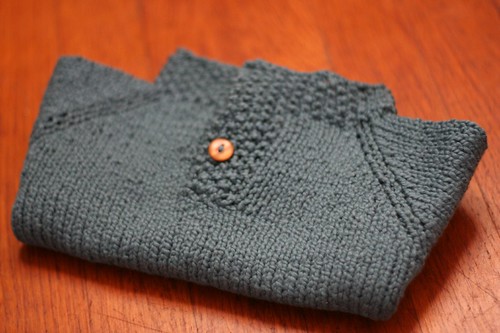
I encountered some gauge issues... I started with Size 7 Needles, but the fabric was too thin and "holey" for me. I reknit with Size 6 needles and the resulting fabric is nice and dense, but maybe a touch thicker than I prefer. I'd rather err on the the "too thick" side, so I went with the 6's.

Final Verdict: Success! It's a versatile little sweater and because it's cotton, it should transition well through the winter/spring seasons. But for now, this sweater will collect dust while we wait for this baby to get here!


With this sweater off the needles, I am officially free to knit just for my baby! (Unless I fall weak and take on other projects...) I already started a new baby sweater set...

...The Pea Pod Baby Set

Comments

Popular posts from this blog

Box Bag Tutorial

A couple of you inquired whether I made this pouch based on a tutorial or pattern and if not, if I could provide one. Ask and you shall receive! I've learned so much from tutorials out on the internets, I'm happy I can give back for once. Bear with me, though. This is my first tutorial and creating one is much tougher than I imagined. I give anyone who's created a tutorial tons of credit! I feel obligated to preface this by admitting I'm a trial and error sewer. I make things up as I go along and test things during the sewing process to see if I'm achieving my desired results. Also, I taught myself to sew just playing around on a sewing machine, so I don't always use text book methods. Just wanted come clean before you all jump into this and so you have a little understanding if I did something in a backass way. The pattern works, which is all that matters to me! Because of the versatility of this pattern, my instructions can be used more as guidelines. You can

Done: Weekender Bag

Happy 2007! I hope you all had a good time ringing in the new year. I have some lofty goals for this upcoming year and some musings on last year, but that's for another post because-- Finally! (the top looks kind of bumpy. I think it looks crisper when I'm holding it.) Pattern. Weekender Bag by Amy Butler Exterior Fabric. Amy Butler, Sunbloom Collection Cording Fabric. Amy Bulter, Charm Collection Lining. Khaki Fabric from Joann's I relied a lot on the tips from other bloggers who made this bag and wanted to give something back to the blogging community, so here are my.... 10 THOUGHTS & TIPS ON THE WEEKENDER 1. Dominating the cording. As the layers increased in the sewing, keeping the cording sandwiched in place became challenging. I had the best luck pinning the fabric together parallel to the fabric edge, rather than perpendicular. Stopping so often to remove pins got a little annoying, but was better than ripping and resewing. 2. Topstitching = Enemy number 1. I d

Granola.

In all my years of baking, I don’t think there’s any one food I’ve tinkered with more than granola.  Actually, that’s a lie. Let me try again. Besides chocolate chip cookies, there's no food I've tinkered with more than granola.   But granola! The goal: delicious, crunchy yet chunky enough to eat on its own, and not just dessert masquerading as a healthy snack. Doesn’t sound too hard.  But… the best tasting is inevitably the worst for you (not to name names...Panera copycat recipe). Consistency should not be a trail mix of sugared oats and nuts and fruit. There should be chunks you can hold without crumbling.   So, when I stumbled upon a granola so good the restaurant sends guests home with their own little prepackaged personal sized portion, I had to give it a try. And to document my trials so when I inevitably forget the recipe, I'm writing this post so it’s here waiting and ready. (And maybe, you, too, have been seeking that perfect granola recipe??)