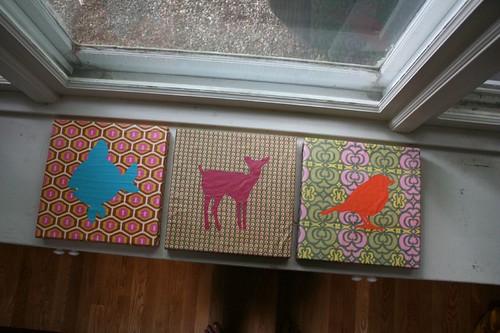
I've wanted to make these painted silhouettes since Anna Maria Horner was on Martha last year. Finally, I found a perfect place for them - the nursery! That, plus my having the perfect amount of leftover fabric from the baby's quilt and this project was kismet.
I used the wren stencil provided in the tutorial and scoured the internets for some other animal shapes that could hold their own without much detailing. I fell in love with the fawn immediately, but waffled back and forth between the fish and an owl. I let J make the final choice and he selected the fish. which works because I want to make these stuffed fish, inspired by Ms. Julie Frick. I think the fish still needs a little something something - maybe a button eye will do the trick?

Materials
- 3 12" x 12" x 1.5" canvases
- less than 1/4 yard each print Amy Butler fabric, Midwest Modern collection
- Fabric Modge Podge (I'm sure any variety will work, I just thought I would get more use out of the Fabric type)
- Fabric Paint (I bought both Jacquard and a cheaper craft store brand and much preferred the craft store brand. The Jackquard was running and leaked through the fabric instead of adhering to it.)
- Freezer Paper (Optional)
- Paper Stencils
- Paintbrushes

Comments/Modifications
I adhered to the tutorial for the most part, but diverged at a couple of points.
- I used a standard office stapler, not a staple gun as specified in the tutorial. It wasn't even a nice Swingline or anything - just a mini variety J had in college.
- I tried a couple of painting techniques to see which worked best for me. For the fish, I followed the tutotial to the T. However, after I applied the modge podge the fabric stretched out a buckled quite a bit. This, coupled with a hankering for some freezer paper stenciling, was enough to stop me from modge-podging the other two.
- I had mixed results with both methods. The paint gripped much better to the modge-podged canvas because it had a bit more tooth. While I had to be more fastidious with my painting, overall, it was easier to paint and required fewer coats. Also, rest assured, the buckles and stretching magically disappeared as the canvas dried.
- With the freezer paper stenciled versions, I ironed the freezer paper to the canvas, then painted the animal, removed the freezer paper, ironed the (now dry) paint, and then applied the modge podge. It was definitely less stressful painting with the freezer paper, but the fabric buckled during painting, then again during modge-podging. Unfortunately, the buckles are still somewhat obvious, but I'm slowly coming to terms with it. Also, the paint didn't set as well (even though it was fabric paint) and required two coats - one before and after modge-podging. Add those extra steps with the time it takes to cut your freezer paper and this method is certainly more time consuming.

All said and done, I prefer the tutorial's method. This was a refreshing project - it's been a while since I pulled out my paintbrushes and put down the needles (sewing and knitting). I can see more of these in the future. 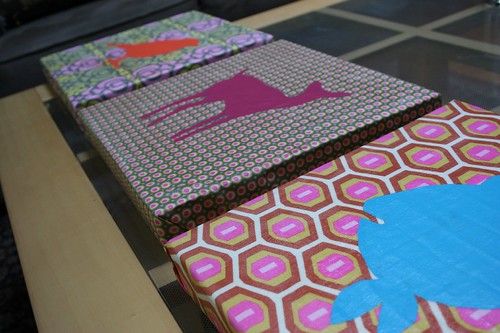
Oh, and one more thing! It's been a LONG time since I've been so smitten with a sweater. Have you all seen this?! I can't wait to cast on.

I think I'll keep the wheat color as the MC, but sub in an orangey brown and navy for the CCs.
Comments
uggs uggs
ugg australia ugg australia
ugg sale ugg sale
ugg boots sale ugg boots sale
cheap ugg boots cheap ugg boots
winter boots winter boots
discount ugg boots discount ugg boots
cheap uggs cheap uggs
uggs on sale uggs on sale
australia ugg boots australia ugg boots
ugg boots 2010 ugg boots 2010
ugg boots ugg boots
ugg stiefel ugg stiefel
uggs uggs
ugg australia ugg australia
ugg boots sale ugg boots sale
ugg boots deutschland ugg boots deutschland
uggs on sale uggs on sale
uggs uggs
MBT Outlet MBT Outlet
GHD GHD
G Star Raw G Star Raw
ed hardy ed hardy
Abercrombie And Fitch Abercrombie And Fitch
tiffany jewelry tiffany jewelry
Abercrombie And Fitch Abercrombie And Fitch
Abercrombie And Fitch Abercrombie And Fitch
Cartier Cartier
Gucci Gucci
shamwow shamwow