When my sister got engaged almost two years ago, planning a wedding quilt was high on my list of to-dos. I thought about making her a bed-sized quilt, but somehow that seemed almost too personal. How could I pick out her bedroom set colors? I guess I could have just consulted her, but I wanted it to be a surprise and I wasn’t willing to spend HOURS (years for me and my procrastinating) slaving on something that could wind up in a linen closet all sad and alone.
Also, all the ladies in my family tend to be drawn to some more outlandish designs and colors and that didn’t seem appropriate for their first set of bedding. So, I decided to go completely wild with color and pattern and make a smaller throw quilt. Of course, I went to one of the masters of quilting herself for this String Quilt Tutorial.
Timeline
I see bloggers churn out a queen-sized quilt in a weekend and I’m in perma-awe of those rockstars. I don’t know if it’s my limited attention span or what, but every quilt I’ve made (save for the girls’ quilts) has taken me in upwards of a year to complete. Most of that time, the quilt has spent tucked away somewhere in pieces. Out of sight, of mind. But not this time. This time I was going to be one of those superstars. Instead of being the flakey sewer with big ideas and last minute execution, I was planning ahead!
Before Sara’s shower, I kicked my sewing into overdrive and slowly but surely my little pile of blocks grew. I was actually starting to believe I would have a finished quilt all wrapped up and nestled in her pile of gifts. She would be surprised! She would twirl around and wrap herself up in her new, warm quilt! It was really happening!
Fastforward a bit to when I could count the hours I had to pack myself, the girls, the dog, finish the shower prep, etc. And you didn’t actually think the only thing on my to-do list was this quilt, right? Part of the decorations included a clothes line and of course all of its adornments needed to be homemade (the bar always starts high). I sewed oven mitts and a flirty little apron (these I actually got done in advance. Like a week early. A record.). No strings were clipped, but they were finished otherwise.
I sewed eleventy billion buttons to a fabric covered canvas that formed the shape of an “E,” her new last name initial. I made my favorite carrot cake recipe from scratch. I made cake pops.
My dream was quickly slipping through my finger tips. Like anyone would do, I lowered the bar. I would finish the quilt without the binding. Yes, she would barely know the difference!
But, once you lower the bar it’s SO easy to just keep lowering it. The quilt without a binding quickly became just the quilt top. Patience and time were running thin. But, I was SO close. Just as I sat down to my sewing machine to seam the blocks together, a terrible thing happened. My sewing machine jammed. JAMMED. Probably doesn’t seem like a big deal, but when you have your day allocated to the minute it’s kind of a big deal. With mental breakdown imminent, rather than taking ten (oh so critical!) minutes to pick out the lint, I gave up. My blocks were exactly that… blocks. Not even sewn together.
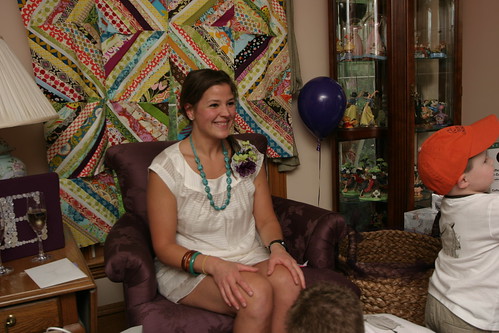
Happy Bride-to-Be Sara with her “E” frame and Stapled Quilt top in the background
Still, I brought my little pile to New Jersey for the shower with no clear plan of attack. Wrap them up in a box with a promise to sew them together? Surely that was better than nothing. Someone, maybe me, had the idea to STAPLE them together and use the stapled quilt top as a decoration. I was desperate, so I gave it a try. Turns out… it kind of worked. And Sara loved her staple quilt top. And loved the finished quilt, which she received….nearly a year later… even more! Win!
Some commentary:
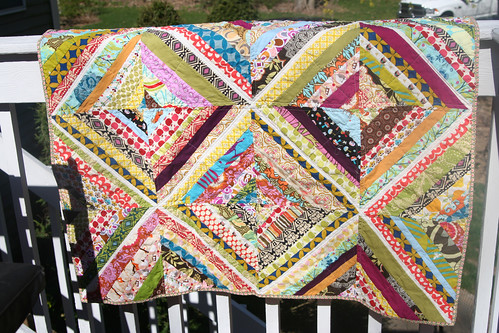
- I started with a rough palette of reds and greens and yellows and eggplants, but you’ll see I only followed that loosely at best.
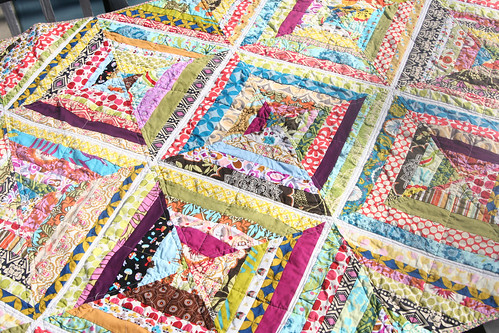
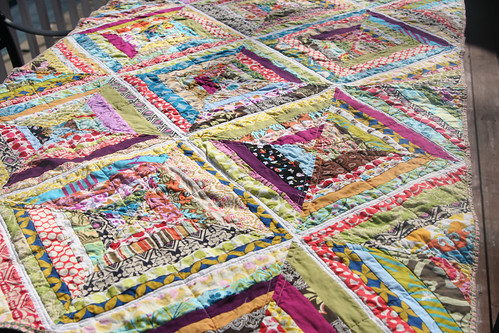
- Each square had a 1 inch strip of Kona Snow running down the center
- This was my first dabble into paper piecing
- Paper piecing is sort of amazing, though I got sick of dulling needles
- Somehow mixing all sorts of colors and patterns works.
- Fabrics are pulled from my stash and other leftovers from years of projects, but are from the usual players… Kona solids, Amy Butler, Anna Maria Horner, Alexander Henry, etc.
- Squares are 11x11
-Finished Quilt is 6 blocks x 4 blocks
Also, all the ladies in my family tend to be drawn to some more outlandish designs and colors and that didn’t seem appropriate for their first set of bedding. So, I decided to go completely wild with color and pattern and make a smaller throw quilt. Of course, I went to one of the masters of quilting herself for this String Quilt Tutorial.
Timeline
I see bloggers churn out a queen-sized quilt in a weekend and I’m in perma-awe of those rockstars. I don’t know if it’s my limited attention span or what, but every quilt I’ve made (save for the girls’ quilts) has taken me in upwards of a year to complete. Most of that time, the quilt has spent tucked away somewhere in pieces. Out of sight, of mind. But not this time. This time I was going to be one of those superstars. Instead of being the flakey sewer with big ideas and last minute execution, I was planning ahead!
Before Sara’s shower, I kicked my sewing into overdrive and slowly but surely my little pile of blocks grew. I was actually starting to believe I would have a finished quilt all wrapped up and nestled in her pile of gifts. She would be surprised! She would twirl around and wrap herself up in her new, warm quilt! It was really happening!
Fastforward a bit to when I could count the hours I had to pack myself, the girls, the dog, finish the shower prep, etc. And you didn’t actually think the only thing on my to-do list was this quilt, right? Part of the decorations included a clothes line and of course all of its adornments needed to be homemade (the bar always starts high). I sewed oven mitts and a flirty little apron (these I actually got done in advance. Like a week early. A record.). No strings were clipped, but they were finished otherwise.
I sewed eleventy billion buttons to a fabric covered canvas that formed the shape of an “E,” her new last name initial. I made my favorite carrot cake recipe from scratch. I made cake pops.
My dream was quickly slipping through my finger tips. Like anyone would do, I lowered the bar. I would finish the quilt without the binding. Yes, she would barely know the difference!
But, once you lower the bar it’s SO easy to just keep lowering it. The quilt without a binding quickly became just the quilt top. Patience and time were running thin. But, I was SO close. Just as I sat down to my sewing machine to seam the blocks together, a terrible thing happened. My sewing machine jammed. JAMMED. Probably doesn’t seem like a big deal, but when you have your day allocated to the minute it’s kind of a big deal. With mental breakdown imminent, rather than taking ten (oh so critical!) minutes to pick out the lint, I gave up. My blocks were exactly that… blocks. Not even sewn together.
Happy Bride-to-Be Sara with her “E” frame and Stapled Quilt top in the background
Still, I brought my little pile to New Jersey for the shower with no clear plan of attack. Wrap them up in a box with a promise to sew them together? Surely that was better than nothing. Someone, maybe me, had the idea to STAPLE them together and use the stapled quilt top as a decoration. I was desperate, so I gave it a try. Turns out… it kind of worked. And Sara loved her staple quilt top. And loved the finished quilt, which she received….nearly a year later… even more! Win!
Some commentary:
- I started with a rough palette of reds and greens and yellows and eggplants, but you’ll see I only followed that loosely at best.
- Each square had a 1 inch strip of Kona Snow running down the center
- This was my first dabble into paper piecing
- Paper piecing is sort of amazing, though I got sick of dulling needles
- Somehow mixing all sorts of colors and patterns works.
- Fabrics are pulled from my stash and other leftovers from years of projects, but are from the usual players… Kona solids, Amy Butler, Anna Maria Horner, Alexander Henry, etc.
- Squares are 11x11
-Finished Quilt is 6 blocks x 4 blocks
Comments
Kristine
weardiynz.blogspot.com