Thanks for all the lovely messages about Alice! We're getting into a groove around here and I've finally been able to do a little crafting. My sewing machine has finally seen some use and thanks to some sage advice from Elizabeth over at A Mingled Yarn (Thanks, Elizabeth!), I'm finally able to knit while nursing.
Speaking of nursing, after tearing through a couple of boxes of nursing pads I decided to take matters into my own hands and make my own more environmentally-friendly version. I couldn't find an available pattern on the internet, so I thought I would share mine with you. There are probably better ways to construct them, but this worked for me.

Don't they look like ravioli?
What you'll need to make 12 breast pads (6 sets):
1/2 yard cotton flannel* (I used a natural color because I didn't want a wild print peeking through my shirt. You can go crazy with creativity, though)
1/4 yard cotton batting*
scissors
thread
*A note on fabric: I used cotton flannel and cotton batting because I had them around, but you can use whatever you'd like. I'd recommend using natural, breathable, but absorbent fabrics like cotton, hemp or bamboo. Also, feel free to add as many layers as necessary. I didn't want to add any bulk to my new, er, nursing figure, so I kept my pads on the slimmer side.
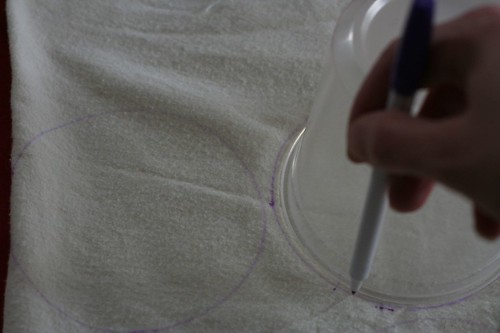
Step 1: Trace circles onto all fabrics. Trace 2 circles for every pad on flannel, and one for each on cotton batting. I used a 4.5 inch food container as my template. Use whatever you have around... mugs, plates, etc. Your template should be slightly larger (about 1/2 inch) than your finished nursing pad size.
Step 2: Cut out circles.

Step 3. Create pad "sandwiches." Flannel on the top and bottom with batting in the center.

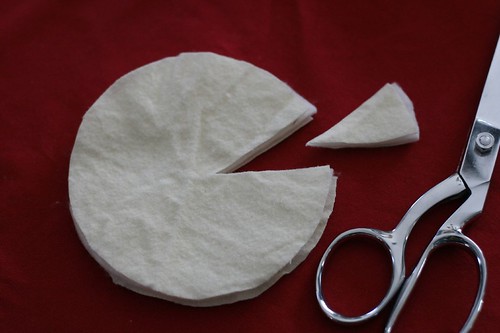
Step 4. Cut out a wedge of fabric to make "pacman" shape. Do not cut wedge all the way to the center, but just before. This will prevent extra pointy nipples!
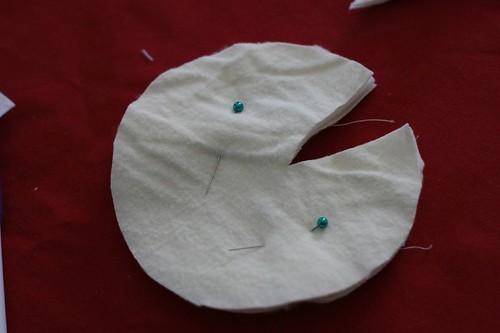
Step 5. Pin fabric in place.
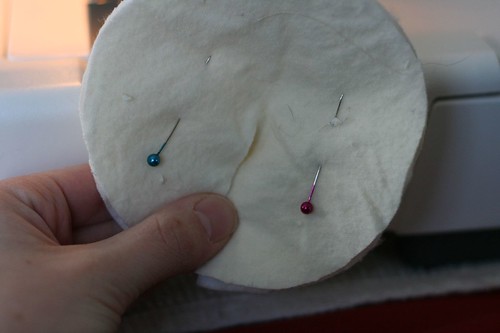
Step 6. Bring two wedge sides together to make cone shape.
Step 7. Using a wide zig zag stitch, baste cone in place. Don't worry if some of the layers aren't secured by the stitches.

Use your sewing machine's widest zig zag setting.
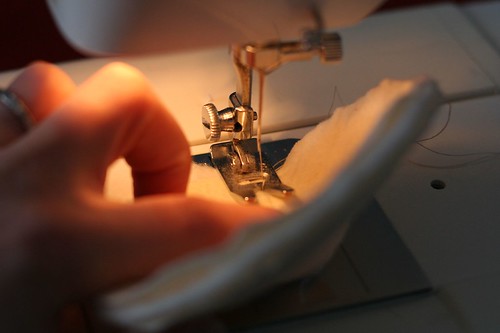
I started on the outside of the circle and sewed towards the center.
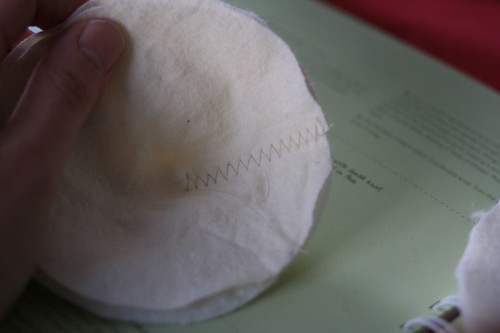
Step 8. Flip cone over and stitch over your basting line. This will ensure all layers are stitched together.
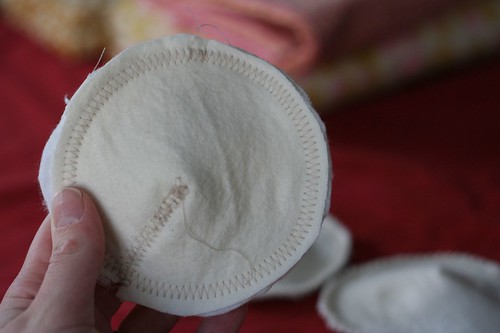
Step 9. Zig Zag Stitch (or serge, if you're lucky enough to have a serger) along circle's perimeter.
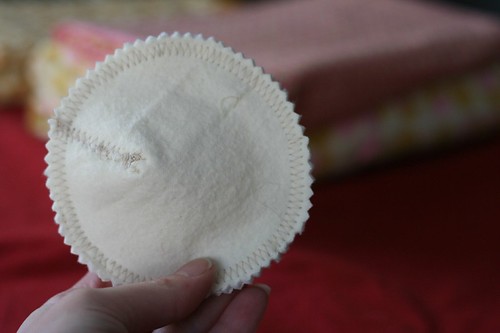
Step 10. Use crimping scissors (or regular scissors) to trim egdges. If you serged your edges in Step 9, you can ignore this step.
Speaking of nursing, after tearing through a couple of boxes of nursing pads I decided to take matters into my own hands and make my own more environmentally-friendly version. I couldn't find an available pattern on the internet, so I thought I would share mine with you. There are probably better ways to construct them, but this worked for me.
Don't they look like ravioli?
What you'll need to make 12 breast pads (6 sets):
1/2 yard cotton flannel* (I used a natural color because I didn't want a wild print peeking through my shirt. You can go crazy with creativity, though)
1/4 yard cotton batting*
scissors
thread
*A note on fabric: I used cotton flannel and cotton batting because I had them around, but you can use whatever you'd like. I'd recommend using natural, breathable, but absorbent fabrics like cotton, hemp or bamboo. Also, feel free to add as many layers as necessary. I didn't want to add any bulk to my new, er, nursing figure, so I kept my pads on the slimmer side.
Step 1: Trace circles onto all fabrics. Trace 2 circles for every pad on flannel, and one for each on cotton batting. I used a 4.5 inch food container as my template. Use whatever you have around... mugs, plates, etc. Your template should be slightly larger (about 1/2 inch) than your finished nursing pad size.
Step 2: Cut out circles.
Step 3. Create pad "sandwiches." Flannel on the top and bottom with batting in the center.
Step 4. Cut out a wedge of fabric to make "pacman" shape. Do not cut wedge all the way to the center, but just before. This will prevent extra pointy nipples!
Step 5. Pin fabric in place.
Step 6. Bring two wedge sides together to make cone shape.
Step 7. Using a wide zig zag stitch, baste cone in place. Don't worry if some of the layers aren't secured by the stitches.
Use your sewing machine's widest zig zag setting.
I started on the outside of the circle and sewed towards the center.
Step 8. Flip cone over and stitch over your basting line. This will ensure all layers are stitched together.
Step 9. Zig Zag Stitch (or serge, if you're lucky enough to have a serger) along circle's perimeter.
Step 10. Use crimping scissors (or regular scissors) to trim egdges. If you serged your edges in Step 9, you can ignore this step.
Step 11: Enjoy dry shirts, while saving the planet (okay, this part might be a stretch, but every little bit counts)!
Comments
uggs uggs
ugg australia ugg australia
ugg sale ugg sale
ugg boots sale ugg boots sale
cheap ugg boots cheap ugg boots
winter boots winter boots
discount ugg boots discount ugg boots
cheap uggs cheap uggs
uggs on sale uggs on sale
australia ugg boots australia ugg boots
ugg boots 2010 ugg boots 2010
ugg boots ugg boots
ugg stiefel ugg stiefel
uggs uggs
ugg australia ugg australia
ugg boots sale ugg boots sale
ugg boots deutschland ugg boots deutschland
uggs on sale uggs on sale
uggs uggs
MBT Outlet MBT Outlet
GHD GHD
G Star Raw G Star Raw
ed hardy ed hardy
Abercrombie And Fitch Abercrombie And Fitch
tiffany jewelry tiffany jewelry
Abercrombie And Fitch Abercrombie And Fitch
Abercrombie And Fitch Abercrombie And Fitch
Cartier Cartier
Gucci Gucci
shamwow shamwow
Hmm. If I were going to make these, I would use different fabric for the inside and outside so I could tell which side was absorbent and which side was waterproof. And as long as I'm going to do that, I can pick an outside with enough friction that it will stay in place in my bra and an inside that will be very smooth against potentially sore nipples.
Hmm. If I were going to do this (and I am about a dozen sewing projects behind), I would use a different fabric for the inside and outside so I could tell which side was absorbent and which side was waterproof. As long as I'm using two fabrics, I could make the outside match my bra and have enough friction that it would stay in place, and make the inside a bright color or whimsical print and very smooth to pamper potentially sore nipples.
If that worked, I might try to improve the next set by following these useful instructions for all but the innermost layer, then try to fold and iron a dart in the inner fabric and sew only around the edge of the cone. That would keep potentially rough stitches away from my nipples.